Origin of the Percolator
 |
| Laurens' Percolator |
Several versions of the percolator have surfaced over the years. Mr. Laurens is often attributed with creating the first percolator in 1819 in France. His device contained a metal pot with a chamber at the bottom that was placed over the heat source. A vertical pipe extended from the chamber to the top of the percolator. A perforated chamber was directly below the top of the pipe. As the water was heated it rose up the central tube to infuse the coffee above.
 |
| Napier's Vacuum Pot |
American James Mason, however, was the first to patent a
coffee percolator on December 26, 1865, but four years later in 1889, Illinois
farmer Hanson Goodrich patented the U.S. stove-top percolator as it is known
today. Goodrich’s percolator used a broad base for boiling, the central tube
allowing water to flow upwards with a perforated basket hanging on the tube. This
design allowed any standard coffee pot of the day to be changed into a
stove-top percolator.

 |
| Electric Percolator |
Modern percolators are electric, stovetop, or
microwave. The electric percolator brews
the most consistent coffee with the advantage of stopping the percolation when
the coffee is ready to drink. Most electric percolators switch to a warming
mode to keep the coffee warm for a considerable length of time. These percolators are often constructed from
heavy duty stainless steel with an indicator light to signal when the coffee is
ready.
 |
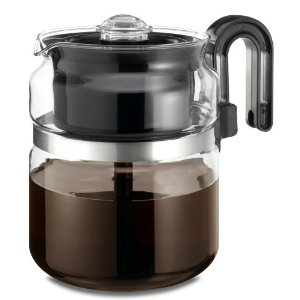
| Stovetop Percolator |
Microwave percolators use up to 42% less energy than the
electric percolator, but the microwave timer needs to be very carefully
monitored to avoid overcooking the coffee.
Coffee percolators are
further differentiated into two types: pressure type and gravity type. The Pressure type coffee percolators have
three sections. They contain a lower section where the water is stored, a
middle section which houses the raw coffee, and the upper section where the
completely brewed coffee is stored. Some of the pressure type percolators lack
the upper section, instead having a tube that delivers the coffee directly into
the cup.
The Gravity type of percolators continuously brews the coffee through
the grounds with gravity determining the strength of the resulting coffee. These
percolators contain several sections: a small chamber which is used for filling
water at the bottom, a vertical tube that reaches from the bottom to the top of
the pot, and a perforated chamber for coarse ground coffee at the end of the
tube.
How to Make Percolator Coffee
 |
| Coarse Grind |
Celebrating National
Percolator Day
 National Percolator Day not
only celebrates the day when the percolator was first patented – it celebrates
a way of way of life that has since departed. Despite the difficulty in
“perking” that perfect cup of coffee using a percolator, many coffee lovers
have refused to give up their percolators, enjoying the strong coffee with the
distinctive taste. Others are choosing percolators for health reasons:
percolators have no plastic parts, thereby avoiding the chemicals that leach
out of plastics when they come in contact with hot water.
National Percolator Day not
only celebrates the day when the percolator was first patented – it celebrates
a way of way of life that has since departed. Despite the difficulty in
“perking” that perfect cup of coffee using a percolator, many coffee lovers
have refused to give up their percolators, enjoying the strong coffee with the
distinctive taste. Others are choosing percolators for health reasons:
percolators have no plastic parts, thereby avoiding the chemicals that leach
out of plastics when they come in contact with hot water.
This year, why not give the
percolator a try? There may be one hidden away in your attic or in that of your
grandparents. If you cannot find one in either of those locations, plenty of
models are still available for purchase. Fill with cool water, add some coarse
ground coffee – being sure to sniff that delicious aroma, add your heat source,
sit back, and listen to your coffee make that distinctive “perking” sound.
http://myperfectcoffee.com
http://myperfectcoffee.com